Continuing the Zabbix series, there are some machines I want to monitor that are behind firewalls or NAT devices I do not control. Thus, I cannot use any passive Zabbix services, and my agent must be active only. This means that the agent connects every few minutes to the Zabbix server to report its status, and does not accept any external connections from the Zabbix server. Unfortunately, Zabbix seems designed around the expectation of passive connections, and active-only agents are something of an afterthought.
Nonetheless, it is possible with a few small tweaks. I also wanted to monitor any GPUs in the system, so I will cover that as well.
I’ll assume you’ve installed a basic Zabbix agent as per one of my previous posts. Follow that, but ignore the configuration part – I’ll cover that here.
Agent configuration
First, create the preshared encryption key:
sh -c "openssl rand -hex 32 > /etc/zabbix/zabbix_agentd.psk"
The contents of the file /etc/zabbix/zabbix_agentd.psk should be something like
405c8307fb55d3ccf77753a5cd19fd47d9ed254b366800e05637b02501b243b8
Then, modify the configuration file /etc/zabbix/zabbix_agentd.conf to have the following settings, in addition to the defaults for PidFile or logging:
Server=127.0.0.1 #prevents any external connections in case of misconfiguration
StartAgents=0 #disables listening for external connections
ServerActive=zabbix.example.ca #connect to this server
Hostname=whateveryouwant
TLSConnect=psk #make only encrypted connections
TLSAccept=psk #not strictly necessary but safer
TLSPSKIdentity=someidentity #set to a unique name
TLSPSKFile=/etc/zabbix/zabbix_agentd.psk #use this encryption key
These settings encrypt the connection, and tell Zabbix that it will be connecting to the Zabbix server, and will not be expecting any connections from said server.
Now, go to your Zabbix server and create a new host, with the following settings:
- Hostname: whateveryouwant – this must exactly match what you put in the configuration file above
- Groups: as desired, but it must be something e.g. Linux servers
- Interfaces: leave at default settings of 127.0.0.1, connected to IP, port 10050
- Templates: select Template OS Linux by Zabbix agent active or as appropriate for your OS. The last part – Zabbix agent active – is critical. This tells Zabbix not to try to connect to your host, but expect only connections from it. Without it, it will throw errors complaining it can’t connect to the host.
- Encryption: make sure PSK is selected, and set the identity to match what you specified in the configuration file e.g. someidentity. The value for the PSK field must match what is in the zabbix_agentd.psk file.
For those who prefer visuals:


The active agent is now set up. Save the settings on the Zabbix server, and restart the service on the host:
systemctl restart zabbix-agent.service
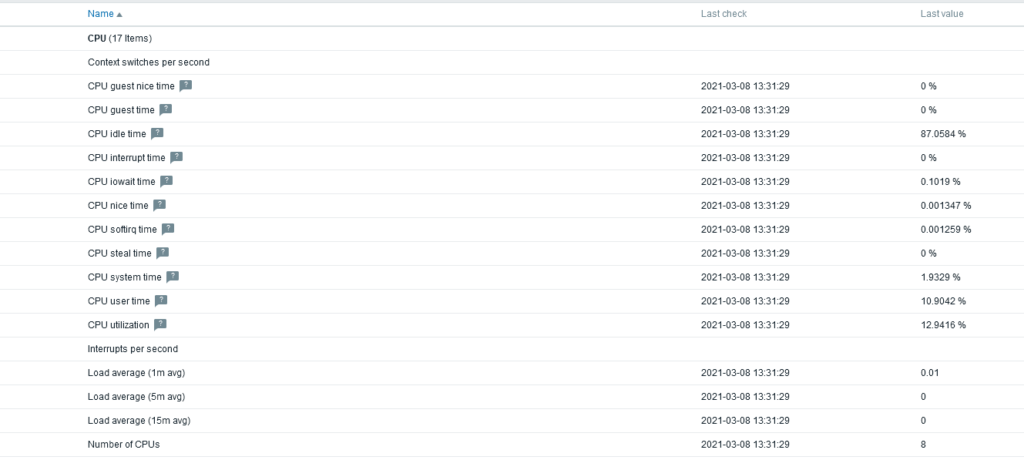
If you go to the Latest Data page, you should see some data from your new host show up:
Nvidia GPUs
As this host has GPUs, we would like to monitor them, to ensure that they are all operating properly. To do this, we need to make use of the code provided here. We will need to modify both the server and the agent. Let’s start with the server.
Download the file zbx_nvidia-smi-multi-gpu.xml to your computer, and go to Configuration → Templates → Import. Select the file you downloaded, and import it:

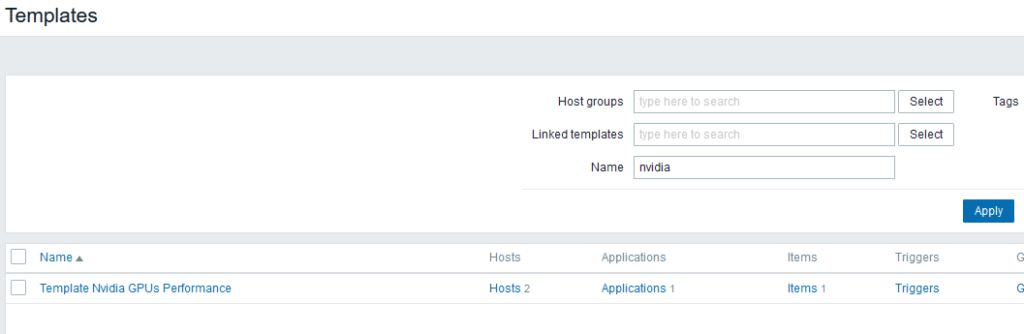
Now, Configuration → Templates should look like this:
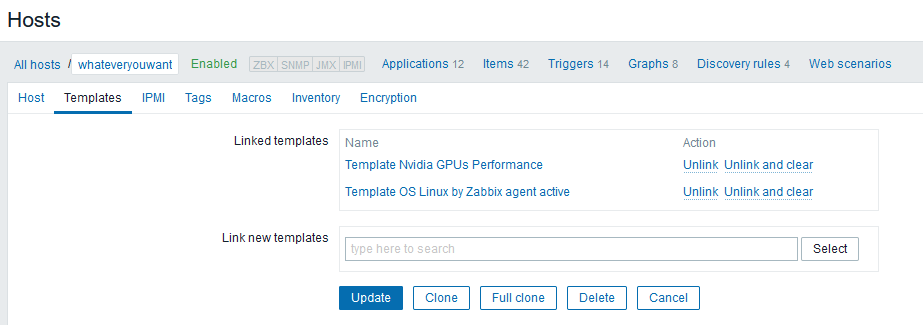
If you were to use a normal passive agent, go to your host, and add this GPU template:
That’s it for the server side if you’re using a normal Zabbix agent. As we are using an active agent, though, we need to make some changes. Let’s start by cloning the GPU template – make sure to use Full Clone rather than Clone:

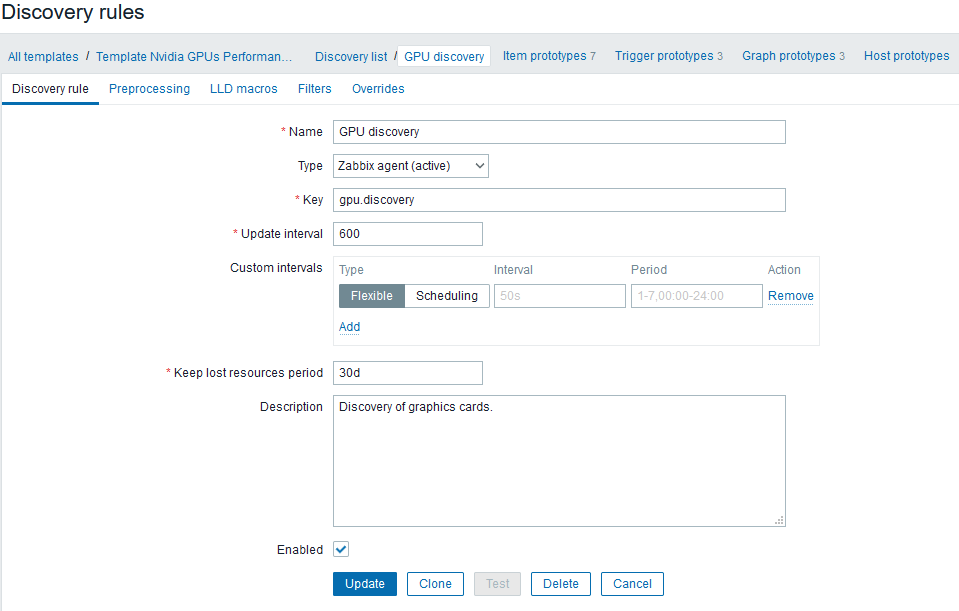
Access the new template and go to Items. Change the type from Zabbix agent to Zabbix agent (active) and update. Next, go to Discovery Rules and clck on GPU Discovery. We want to change the type to Zabbix agent (active):
Next, access the Item prototypes page. There should be 7 of them. Select them all, and click on Mass update:

Change the type to Zabbix agent (active) and update. Finally, go to the host and add the new template:

That’s it for the server. Now, we need to adjust the agent by following the steps outlined in the repository README. Namely, adding parameters to the agent configuration:
UserParameter=gpu.number,/usr/bin/nvidia-smi -L | /usr/bin/wc -l
UserParameter=gpu.discovery,/etc/zabbix/scripts/get_gpus_info.sh
UserParameter=gpu.fanspeed[*],nvidia-smi --query-gpu=fan.speed --format=csv,noheader,nounits -i $1 | tr -d "\n"
UserParameter=gpu.power[*],nvidia-smi --query-gpu=power.draw --format=csv,noheader,nounits -i $1 | tr -d "\n"
UserParameter=gpu.temp[*],nvidia-smi --query-gpu=temperature.gpu --format=csv,noheader,nounits -i $1 | tr -d "\n"
UserParameter=gpu.utilization[*],nvidia-smi --query-gpu=utilization.gpu --format=csv,noheader,nounits -i $1 | tr -d "\n"
UserParameter=gpu.memfree[*],nvidia-smi --query-gpu=memory.free --format=csv,noheader,nounits -i $1 | tr -d "\n"
UserParameter=gpu.memused[*],nvidia-smi --query-gpu=memory.used --format=csv,noheader,nounits -i $1 | tr -d "\n"
UserParameter=gpu.memtotal[*],nvidia-smi --query-gpu=memory.total --format=csv,noheader,nounits -i $1 | tr -d "\n"
and adding a script to /etc/zabbix/scripts/get_gpus_info.sh:
#!/bin/bash

result=$(/usr/bin/nvidia-smi -L)
first=1

echo "{"
echo "\"data\":["

while IFS= read -r line
do
  if (( "$first" != "1" ))
  then
    echo ,
  fi
  index=$(echo -n $line | cut -d ":" -f 1 | cut -d " " -f 2)
  gpuuuid=$(echo -n $line | cut -d ":" -f 3 | tr -d ")" | tr -d " ")
  echo -n {"\"{#GPUINDEX}"\":\"$index"\", \"{#GPUUUID}"\":\"$gpuuuid\"}
  if (( "$first" == "1" ))
  then
#    echo ,
    first=0
  fi
done < <(printf '%s\n' "$result")

echo
echo "]"
echo "}"
which needs to be executable:
chmod +x /etc/zabbix/scripts/get_gpus_info.sh
Restart the agent, and you should see GPU info show up on Zabbix’s latest data page:

Thanks for popularizing my zabbix template for nvidia gpus 😀
You’re welcome!
pls update for zabbix agent2 as well
Hi,
Followed above method, but not working with Zabbix 6.0.26 version, any idea, any updated template available?.